I'm a big girl. Not that I'm grown up, although, yeah, I guess I'm grown up. I mean that when picking out costumes and characters to cosplay, I have to keep in mind I ain't no size 3. You will not see me Cosplaying as Slave Girl Leia. One day when I'm half the girl I am now I'd love to get a Classic Star Trek mini skirt/dress thing, but not today.
So what should I cosplay as? I've drawn up some possibilities, but I need more ideas. NOTE: None of these images are mine. I got them searching Google Images. No idea who the credit goes to for them.
~Donna Noble~
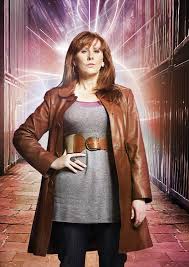 |
| Regular Outfit |
 |
| Wedding Dress |
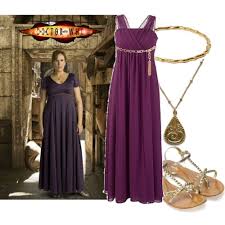 |
| Or Donna in Pompeii |
The Pros: It would be a fairly easy outfit to put together. It's all "Normal" clothes. Not much needs to be made. I could prolly find nearly everything at Goodwill or some other thrift store.
The Cons: It's rather normal looking. Not much of a costume if I could wear it to work and not get a second glance. Except for the wedding dress. I think my boss might have something to say about that. I'd prolly never get recognized except at a Whovian convention. And let's be honest here, I do it for the recognition.
~Rule 63 Jabba the Hutt~
Don't google that. I mean it, just don't.
It was an idea, but no. How do you girl-ify Jabba? Put a bow on his/her head? And I don't think my self esteem could take the hit of dressing up as Mr. Lardbutt himself. (Rule 63 states that for every male fictional character, there is a female version of it. Same for female to male) Google image search was gross and I'm not gonna do it.
~Cheery Littlebottom~
Pros: She's a character from a book so the rules regarding her are so much looser than those of a movie or tv character. And she's from a series of popular books, so the cool kids would recognize her. And I get to wear a beard :D
Cons: I'm not afraid of research, but a literary character will be difficult to get across visually. Oh, and I have to wear a beard :P
~Adipose~
 |
| Fat cells have never been more adorable. |
Pros: Very recognizable. And cute. Don't forget cute.
Cons: The only way I see this getting pulled off well is for it to be a full suit. Fursuit style. I much like making full suits and don't really like wearing them either. Adipose work better as a prop stuffed animal, not a full outfit.
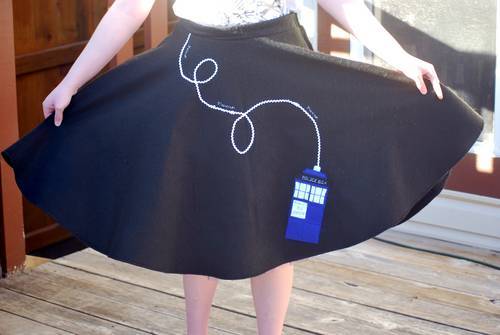
~Tardis/Enterprise~
Tardis dresses have become a Thing. There are no hard and fast rules regarding them, as long as you look at it and go "Huh. That's a Tardis dress".
But I'm thinking why does the Tardis get to have all the fun? What about my girl NCC-1701-D? Otherwise known as the Enterprise from Star Trek: TNG. (No images found because I guess "Enterprise Dress" isn't a thing. I need to fix that. Oooo! How about a Serenity dress too?)
Pros: No one can say your doing it wrong. Unless you misspell Police Box. Then you're probably doing it wrong.
Cons: How do you make an Enterprise dress? Other than that...umm...I'm not sure. Let me think on it and see if I come up with any other cons.
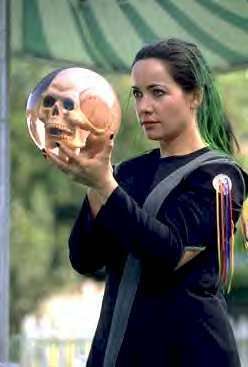
~The Bowler~
Pros: Again a costume that would be easy enough to pull together. Modifying thrift store finds is a lot of fun. The ball would be the hardest prop to find, I think.
Cons: Well the ball. The idea is not to spend to very much money. Or any money at all :) And this is a character from a movie made in 1999, and I don't think the movie did all that well at the time. And I'm not too sure I could pull off the Bowler all that well. I could try, but I don't think I'd look all that good doing it.
Well those are the ideas I've come up with since last night. I'm still thinking, but